
Desk setup guide
The standard for every part of your workstation, with good-vs-bad examples. Tick off the checklist as you fix things; it saves on this device.
By AJ Prince, HEAS · Updated November 2026 · Free
Your desk setup checklist
Want it checked against your body?
The free assessment uses your height, hand size and pain areas to set your exact chair height, desk height and equipment.
The perfect chair setup
Your chair is the foundation of desk work. Set correctly, it holds the natural curves of your spine, takes load off your lower back and lets your shoulders and arms work relaxed. Set poorly, it pushes your body into compensating postures that add strain everywhere else.
Key setup tips
Good vs bad
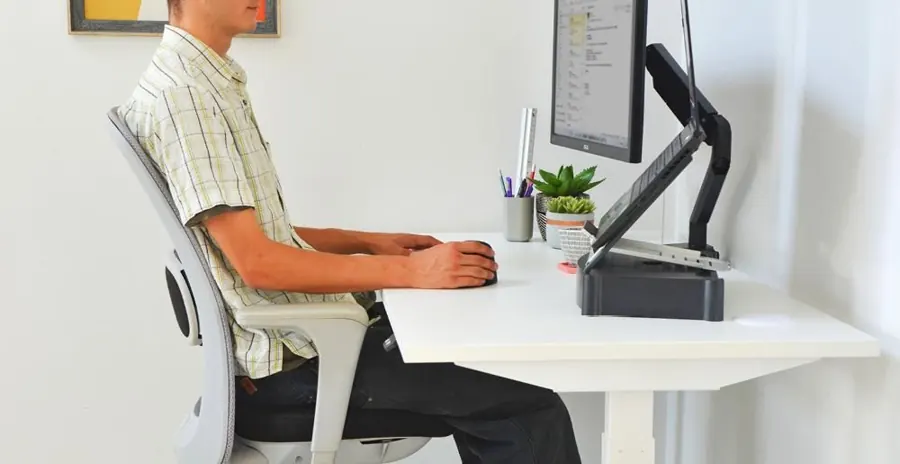
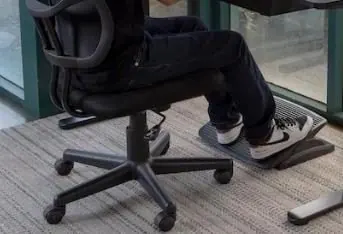
- Sitting reclined
- Full contact with the backrest
- Keyboard at elbow height
- Thighs parallel to the floor
- Feet flat on the floor or a footrest
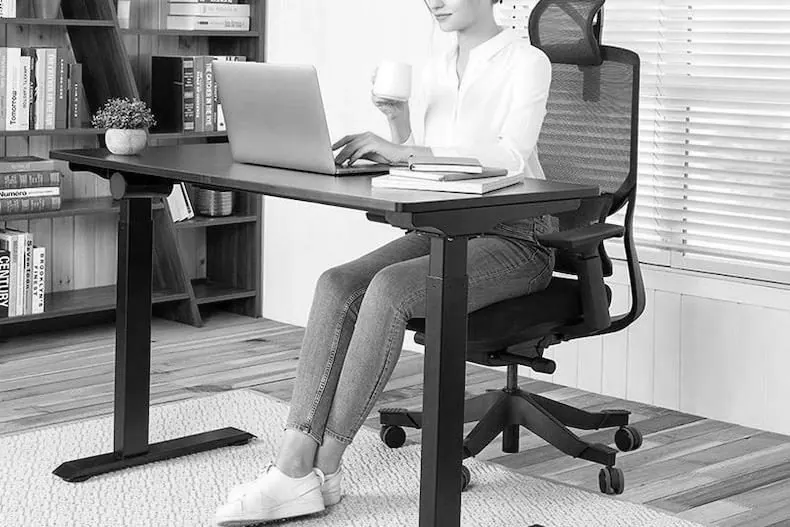
- No recline
- No contact with the backrest
- Thighs not parallel to the floor
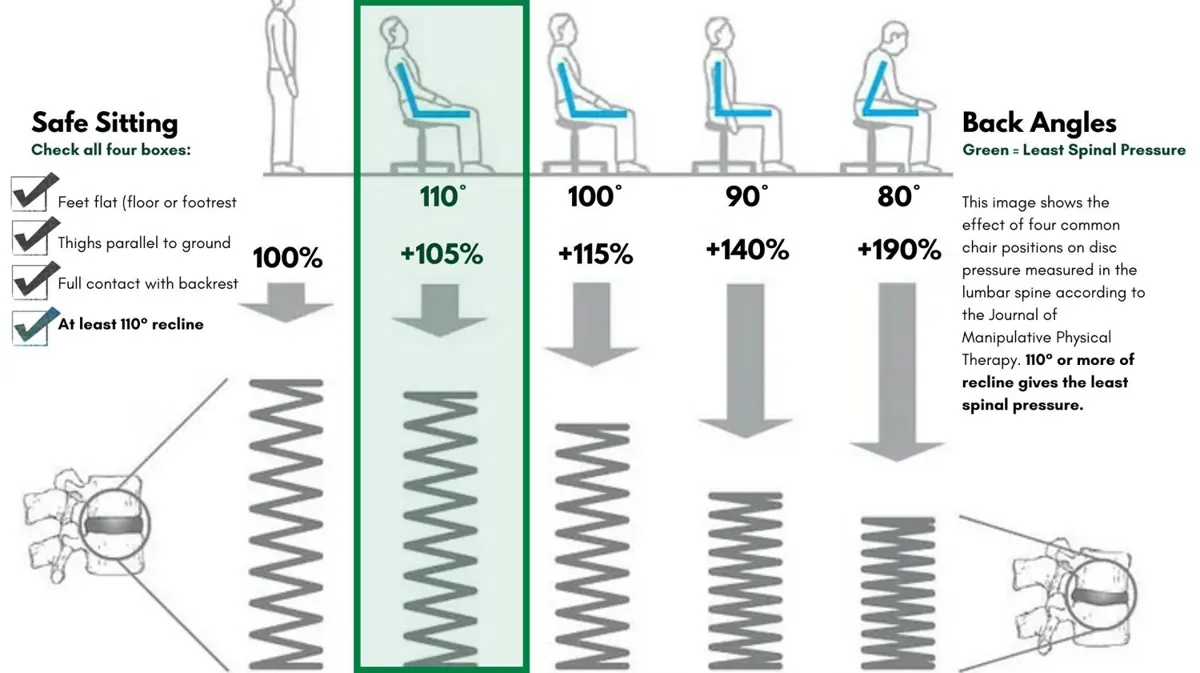
Why sit with recline?
Classic disc-pressure studies found that a supported recline of about 110° loads the lower spine less than sitting bolt upright, and far less than leaning forward. Recline only works if your screen and keyboard come with you, so you don’t drift forward.
Where a poor setup shows up
Equipment we ranked
Read the research
The perfect desk setup
Your desk sets the height and reach of everything on it. The wrong height makes you hunch, lift your shoulders or bend your wrists. Too little legroom forces awkward sitting. Too shallow and your monitor ends up too close; too narrow and you reach and twist all day.
Key setup tips
Good vs bad
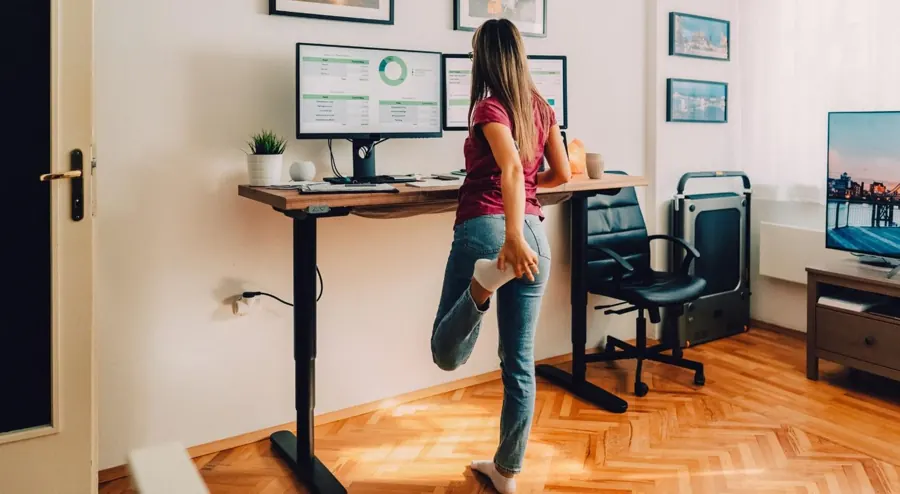
- Desk height adjustable
- Space under the desk is clear
- Surface big enough for your work
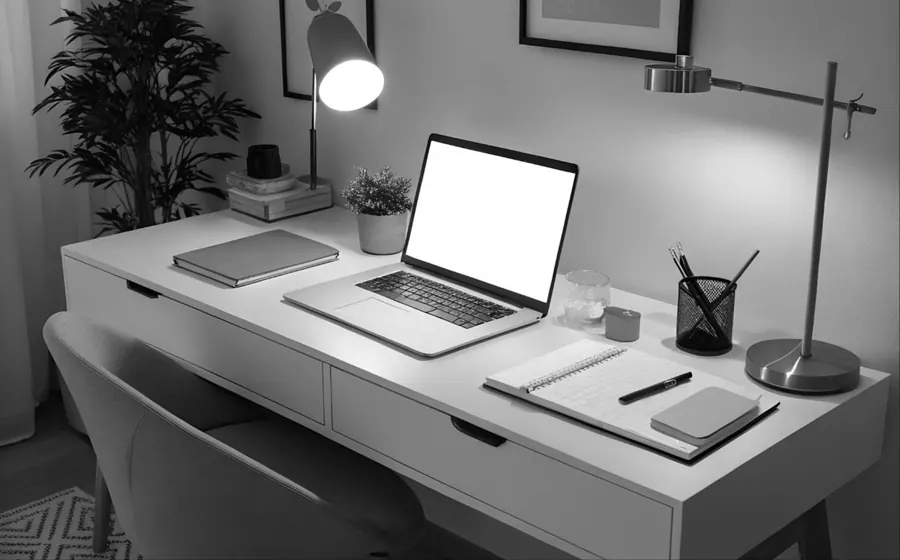
- Desk height not adjustable
- Drawers under the desk block your legs, so you lean forward to reach your work
Desk too high? Three fixes
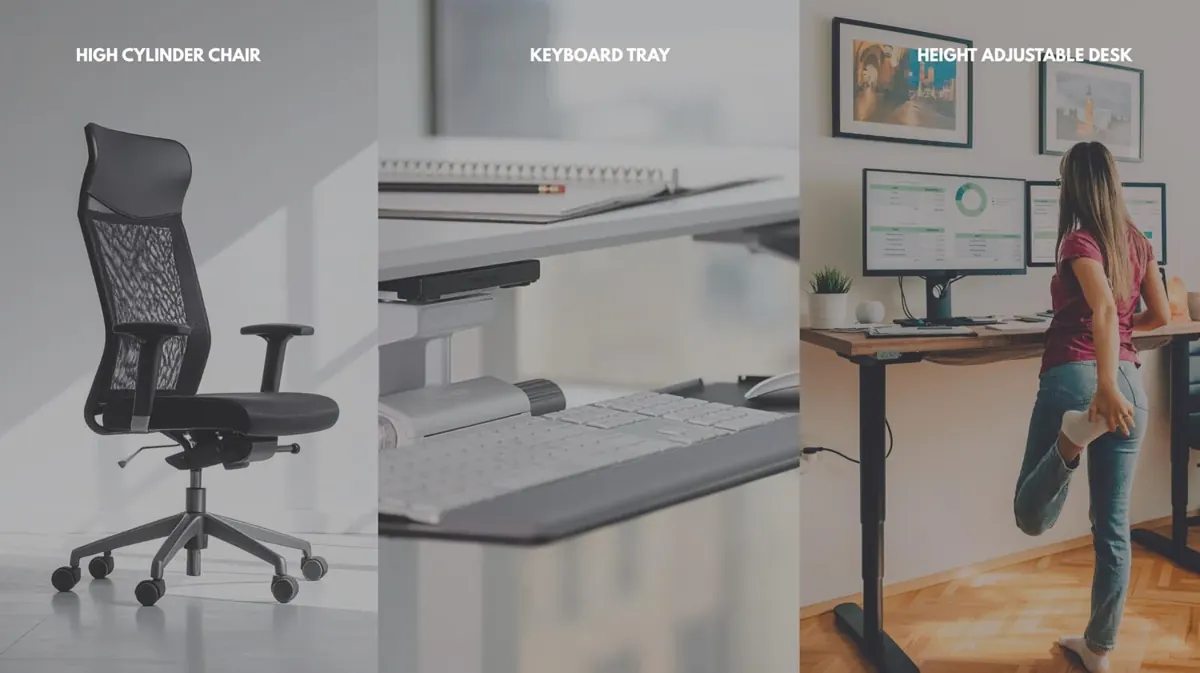
Simplest
Higher chair + footrestRaise the chair until your elbows reach desk height; support your feet.
Chairs · FootrestsKeep your desk
Keyboard trayDrops keyboard and mouse below the desktop to elbow height.
Keyboard traysMost flexible
Adjustable deskExact height for sitting and standing, or a converter on top.
Desks · ConvertersWhere a poor setup shows up
Equipment we ranked
Read the research
The perfect laptop setup
Laptops force a trade-off: a screen at the right height with your hands too high, or comfortable typing with your head bent down. That conflict makes a bare laptop a poor tool for long days — it’s behind “tech neck” and a forward head habit.
Key setup tips
Good vs bad
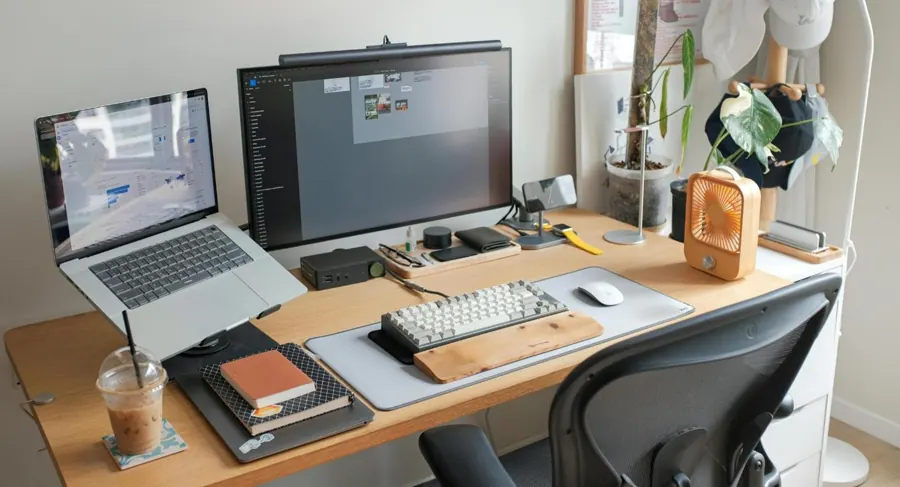
- Laptop on a stand with the screen at eye level
- External keyboard and mouse

- Laptop flat on the desk bends the neck forward
- No external keyboard or mouse — strains the wrists and rules out a stand
Where a poor setup shows up
Equipment we ranked
Read the research
The perfect keyboard setup
Keyboard position drives your shoulder, arm and wrist mechanics. Too high, too far or angled wrong and you lift your shoulders, bend your wrists or reach forward. Set right, your arms hang relaxed at your sides and your wrists stay straight.
Key setup tips
Good vs bad
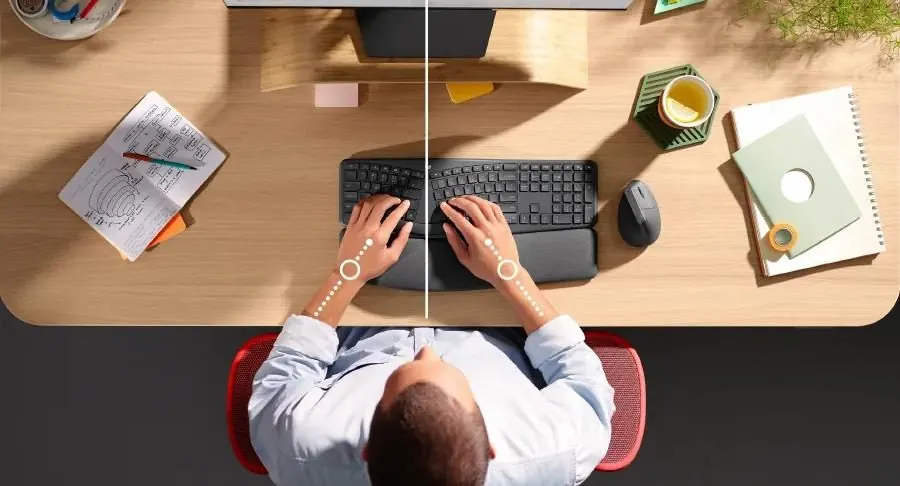
- Wave design reduces sideways wrist bend
- Palm support keeps wrists neutral
- Keyboard at elbow height
- Elbows close to the body, under the shoulders — no reaching
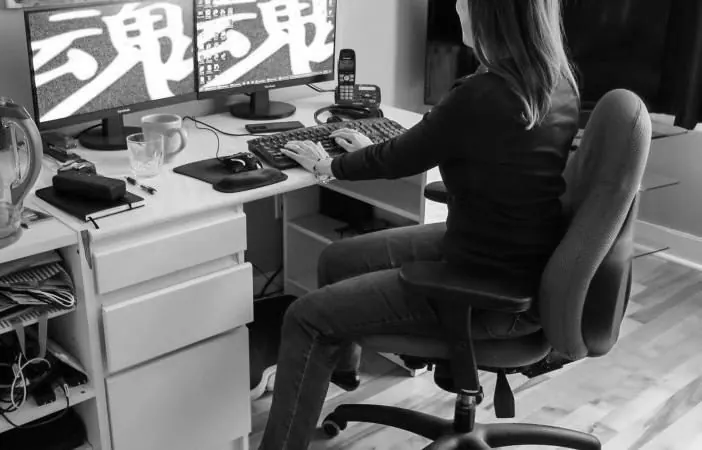
- No palm support; wrists bent up
- Arms extended, elbows away from the body, reaching for the keyboard
The keyboard ladderleast to most aggressive
Step 1
Palm supportFor: Mild, occasional wrist ache
Any keyboard plus a cushioned rest to keep wrists straight.
See picks →Step 3
WaveFor: Wrist plus mild elbow symptoms
A curved key bed that reduces sideways wrist bend.
See picks →Step 4
SplitFor: Moderate wrist and elbow pain
Two halves spaced to shoulder width; less forearm twist.
See picks →Step 5
Advanced splitFor: Frequent, severe wrist and elbow pain
Fully separate halves with tenting — the most neutral position.
See picks →Where a poor setup shows up
Equipment we ranked
Read the research
The perfect mouse setup
Unlike typing, mousing loads one arm with nearly all the repetition, so setup matters more. Set right, the arm moves from the elbow and shoulder while the wrist stays still and neutral. Set poorly, the wrist and forearm do the work.
Key setup tips
Good vs bad
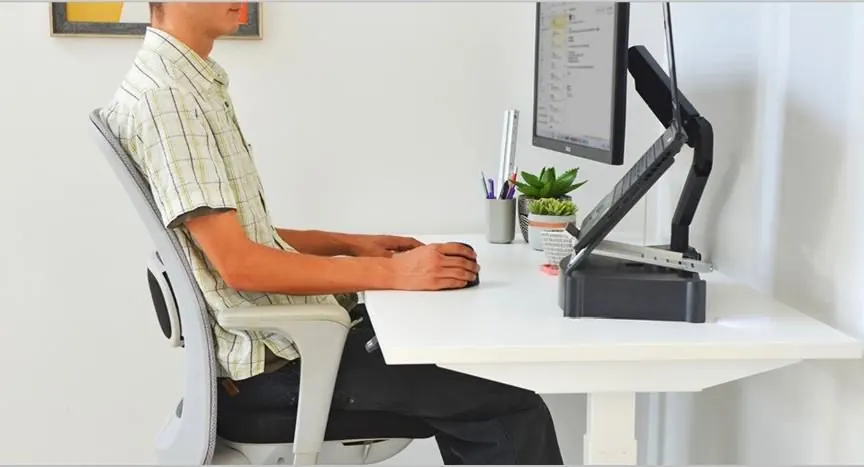
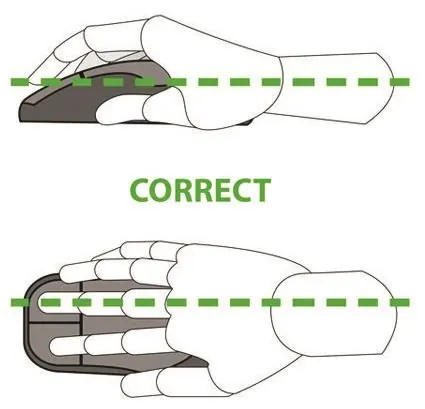
- Move the mouse without moving your wrist
- Mouse at elbow height and close to the keyboard
- Wrist neutral and mouse sized right, so your grip stays relaxed

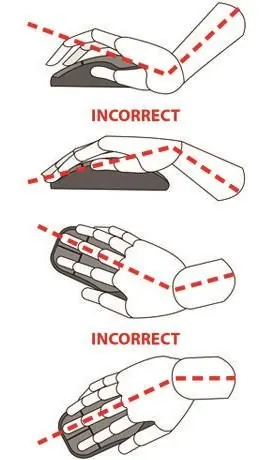
- Moving the mouse with the wrist instead of the arm
- Wrist bent up while mousing
- Clawed, tense grip
The mouse ladderleast to most aggressive
Step 1
Standard ergonomicFor: Mild wrist symptoms, no elbow pain
Sculpted shape that fills the hand for a relaxed grip.
See picks →Step 2
Lift (vertical)For: Wrist pain, with or without elbow pain
Handshake angle that removes forearm twist.
See picks →Step 3
TrackballFor: Frequent wrist and elbow pain, no thumb pain
The device stays still; fingers or thumb roll the ball.
See picks →Step 4
RollerFor: Severe, daily wrist pain
A bar in front of the keyboard moved by fingers and palm — no reach at all.
See picks →Find your size with a credit card
Lay a card’s long side from your wrist crease toward your middle fingertip. Under 2 cards: small. About 2: medium. Over 2¼: large.
Mouse pads
Good for most people at most desks. A smooth, consistent surface means less force to move the mouse.
See picks →Built-in cushion keeps the wrist from bending up. Useful when the wrist rests on the desk edge.
See picks →Room for keyboard and mouse together, so you move from the elbow without running off the edge.
See picks →Where a poor setup shows up
Equipment we ranked
Read the research
The perfect monitor setup
Your monitor controls your head and neck posture all day. At the wrong height, distance or angle, your neck bends, tips back or twists to keep the screen in view — and the fatigue builds. Set right, your head stays balanced and your neck muscles relaxed.
Key setup tips
Good vs bad

- Top of the monitor at eye level
- Monitor 20–30″ from your eyes
- Sitting back in the chair while viewing

- Eyes too close to the screen — eye strain and extra neck movement
- Monitor too low, so you bend forward to read
Good vs bad: equal use

- Monitors 30″+ away
- Screens big enough that you don’t lean in
- The seam between screens centered on your body
- Tops at eye level on a stand or arms

- Center of the two screens not aligned with your body — constant neck rotation
- Monitors too close, forcing extra neck rotation
Good vs bad: unequal use
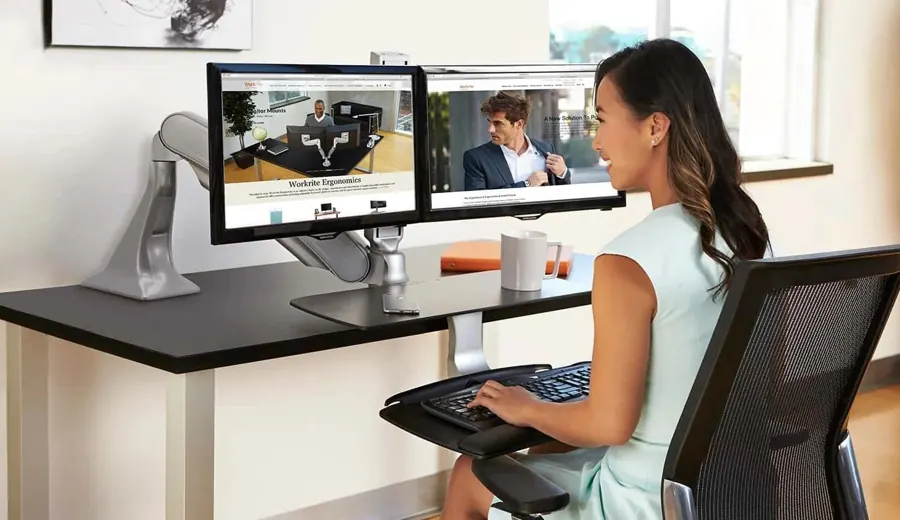
- Monitors 30″+ away with tops at eye level
- Secondary monitor angled right beside the primary
- Primary monitor centered on the spacebar and your body
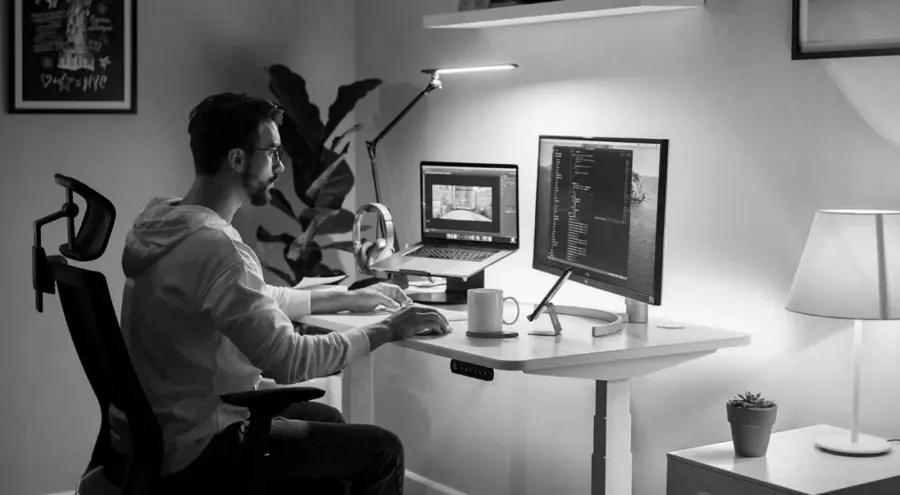
- Second monitor too low, putting your neck at an awkward angle
- Primary monitor off-center, causing neck rotation
Good vs bad
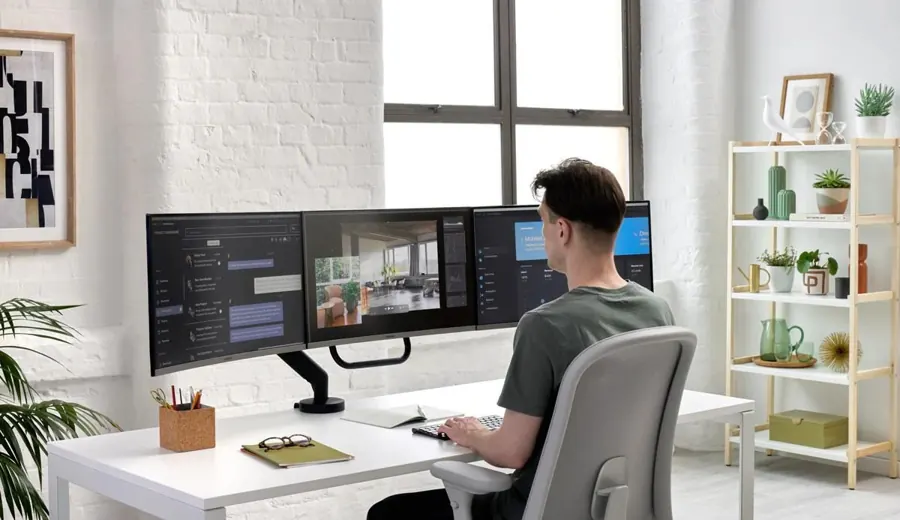
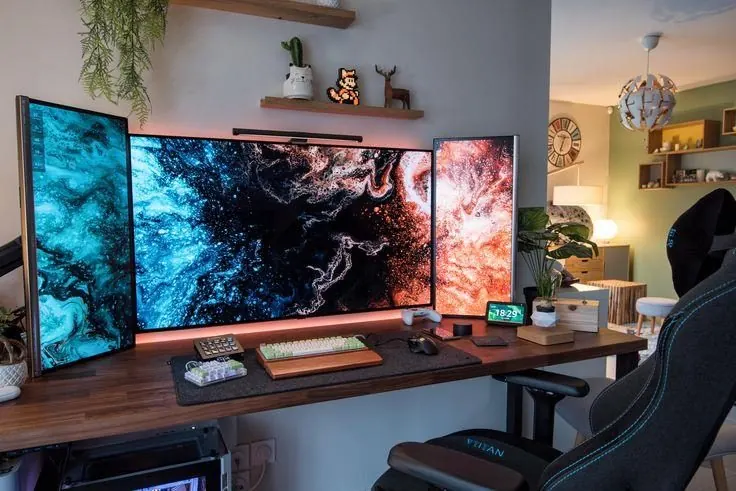
- Center monitor centered on you
- Monitors at eye level and as far back as the desk allows
- Vertical outer screens reduce neck rotation

- Tops not at eye level — neck and spine bend
- Primary monitor slightly off-center
- Monitors not pushed back, adding rotation
Where a poor setup shows up
Equipment we ranked
Read the research
The perfect lighting setup
Lighting shapes how you sit as much as how you see. Too dim and you lean in and squint. Too bright or glary and you tilt or hunch to dodge reflections. Either way your eyes work harder, and the neck and shoulders tense along with them.
Key setup tips
Good vs bad
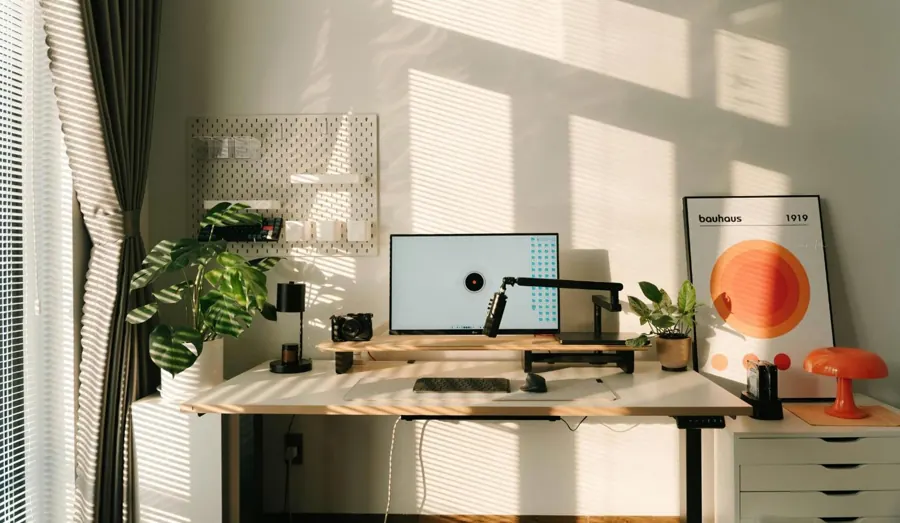
- Curtains and blinds to control daylight
- Room light off or dimmed to stay within 100–500 lux
- Desk perpendicular to the window to cut glare
- A desk lamp to control light where you work
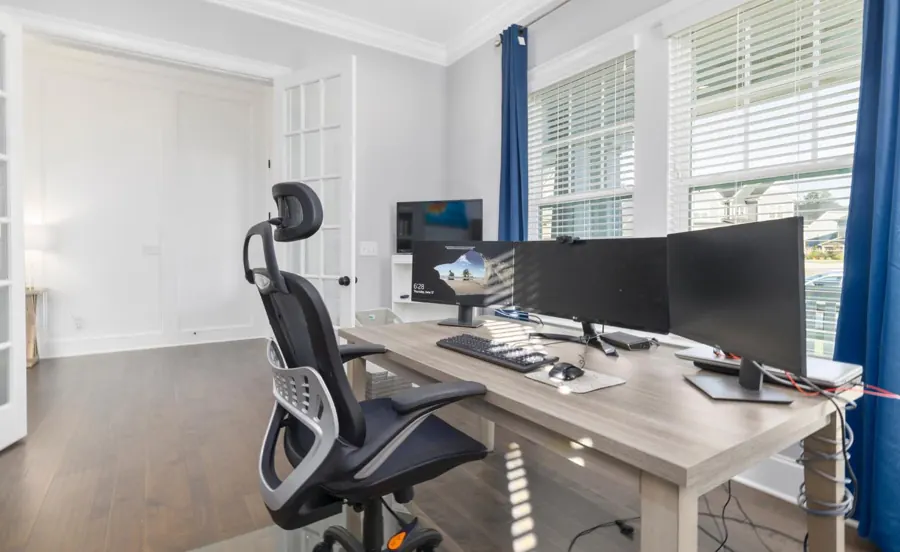
- Bright room light stacked on screen light, far above 100–500 lux
- Window light facing you with the blinds open
Where a poor setup shows up
Equipment we ranked
Read the research
The perfect document setup
Papers flat on the desk make you look down at them, then back up at the screen, hundreds of times a day. That constant nodding loads the neck and upper back. Raising documents to screen level takes most of that movement away.
Key setup tips
Good vs bad

- Document stand lifts paperwork so you read it with minimal neck movement

- Documents flat on the desk — awkward lifting and constant neck bending
Where a poor setup shows up
Equipment we ranked
Read the research
The perfect phone setup
The classic phone mistake is cradling it between ear and shoulder to free your hands. That holds the neck bent to one side and one shoulder hiked up for the whole call. A headset and a well-placed phone end it.
Key setup tips
Good vs bad
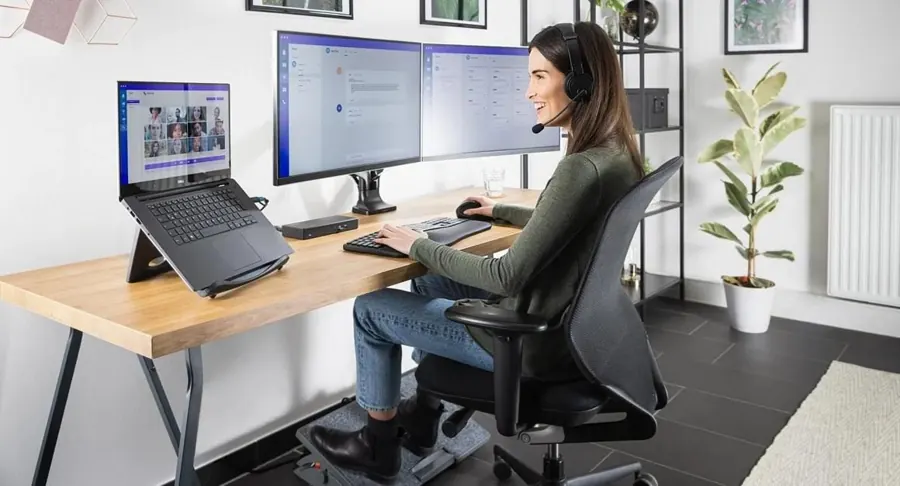
- Headset cuts handset use and awkward neck postures
- Phone flat on the desk, close to your chair

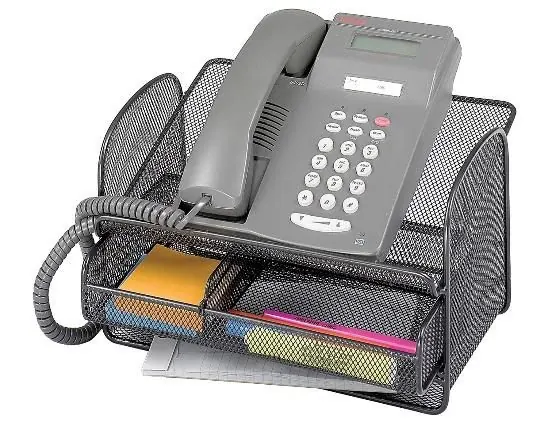
- No headset, so you cradle the phone with your neck
- Phone stands like this force extra shoulder reaching
Where a poor setup shows up
Equipment we ranked
Read the research
Get your exact numbers
Seat height, desk height, keyboard and mouse style, all from your body. Free, about 10 minutes.
Prefer paper? Download the printable PDF.